How do I create and upload my SBA data exports to Nexus?
Nexus is the data repository for SBDC, WBC and SCORE data that is administered by SBA. Nexus came online in October 2023 and it is based exclusively upon the federal fiscal year. Thus, a reporting period for Nexus is October 1 through September 30, regardless of whether your SBDC or WBC has a contract with SBA on a calendar year basis. Prior to Nexus, the SBA used a system called EDMIS.
Quarterly, SBA-funded centers are required to export data to the Nexus system for reporting purposes. At the end of each quarter, you have 30 calendar days, to successfully submit your data. Your quarterly Nexus exports are always comprised of two XML files. The XML files follow the guidelines as provided by SBA. As an SBA-funded resource partner, you are expected to upload your client and session activity in one file (641 data), and your training event information (888 data) in a separate file.
Although Neoserra stores significantly more data than just what is exported (such as client name, phone number, email address, etc), this optional data is omitted from the export in order to keep your Nexus export operations as simple (and private) as possible. It is worth noting that Neoserra will only export client activity, in other words no activity with pre-clients or stakeholders will ever be exported. Furthermore, non-reportable sessions are never exported.
To prepare yourself for the Nexus Export you first have to make sure that your configuration settings are set correctly, and then you can start the process of exporting data:
Note: This FAQ is written for Neoserra administrators, operating in administrator-mode, because they are the only type of Neoserra users that are allowed to perform Nexus exports in Neoserra.
Nexus Configurations
There are several configuration settings that affect your Nexus export process. Each setting should be taken into consideration and is discussed next.
Center Settings
All centers that export to Nexus must have complete address information. The center's address is used as a fall-back address in case no address informatin is provided in the training or client record. You will not be able to create a Nexus export for a center without address information.
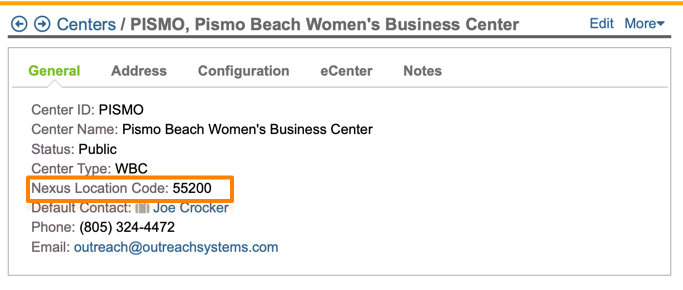
Next, the Nexus Location ID is also a mandatory field to perform exports for this center. You will not be able to create any Nexus Export files for a given center if it does not have a Location ID entered in the field provided. This ID is provided to you by SBA, OutreachSystems cannot provide this information to you. Go to View|Center and edit your center records and add the address and Location ID in the fields provided:
United States SBA/DoD Panel
Under the Administration|Configuration menu option, you will see the United States SBA/DoD panel. This panel contains one critical setting that will affect your Nexus export. The checkbox: Check here to include the center's address (city, state and ZIP) on records missing this information? allows you to use your center's address information when the address is missing either on a client record or on a training event record. If this box is not checked, then any training and/or client record that does not have complete city, State and zip information will block your Nexus export.

You should also define the default funding source(s) for all Nexus exports to ensure consistenty across all exports. When you initially create an export, its funding source filter will default to whatever is set in the Funding source(s) of activity configuration, but it can always be overwritten at the time of Nexus export generation, however, it is important to careful review the funding sources that you export to Nexus.
Similarly, the Center(s) to be included in export to Nexus setting allows you to define the default center(s) for all Nexus exports. When you initially create an export, its center filter will default to whatever is set here, although you can always override the default at the time of Nexus export generation.
General Settings Panel
The above mentioned settings are Nexus specific and are all found on the SBA/DoD panel. There is an additional configuration on the "Settings" panel for you to be aware of. The "Settings" panel allows you to lock data in the Neoserra database that is older than a designated date. Why is this important? This is important because, although SBA allows edits to records previously submitted within the current fiscal year, once the fiscal year has closed, no records from the prior year may be edited.
To lock the Neoserra database after every fiscal year, set the date prior to which users should not be able to edit records in Administration|Configuration|General Settings. For detailed information on record locking, see the FAQ titled How do I "lock" previously reported data to ensure database and reporting integrity?
Starting the process!
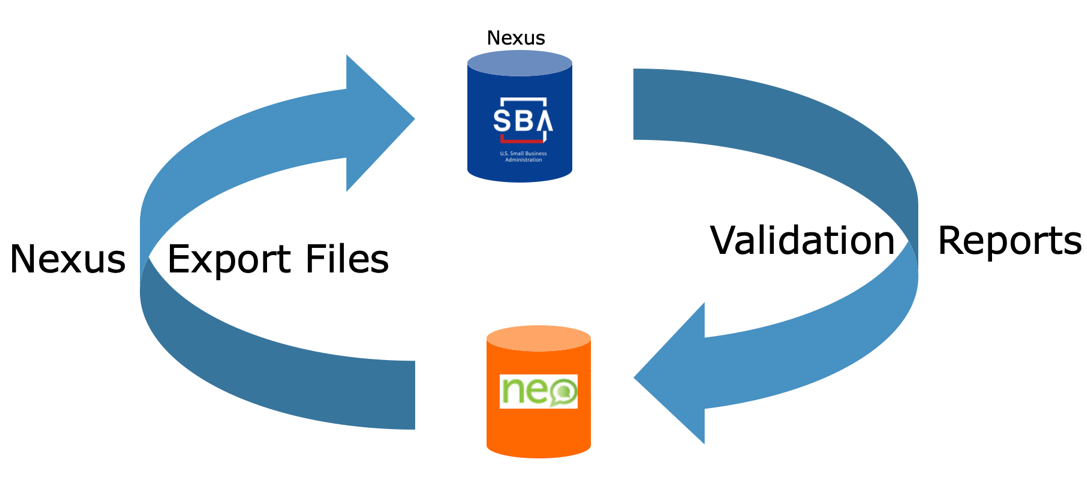
The process of completing your quarterly synchronization with Nexus involves six steps. All steps are mandatory and, to ensure full synchronization between the two systems, the last step of importing your Validation Reports is as important (if not more important) as the first step!
Before you are able to create your first export, all your data must be fully compliant with the Nexus XML specification. Neoserra won't produce an XML file unless your data complies. You can resolve many of the errors found on the Data Maintenance page, but as you create your export file, Neoserra will check for errors one more time.
If you have a record that does not conform to the Nexus requirements, then Neoserra will block your export file from being created. The following are known error conditions that will need to be fixed before you can create an export file:
- Client Errors
- This client is missing a valid primary contact.
- The physical address is incomplete (city, state and Zip required)
- The physical address is incomplete (city and state required when Zip provided)
- No address information and no fallback address from the center.
- The physical address is incomplete (international: city and province required)
- Marked as an exporter w/o export countries.
- Gross revenues exceeds what Nexus supports ($1,000,000,000.00)
- Gross revenues or export revenues are negative
- Total employees exceeds what Nexus supports (32767)
- Total employees is less than those dedicated to exports.
- One of the employee count values is negative.
- A Business Established Date is needed since they are in-business.
- Verified in business conflicts with the Business Status
- The reportable impact date is in the future.
- The signature date is in the future.
- Training Events Errors
- Less than two attendees
- This training event was skipped due to zero hours
- This training event was skipped due to zero sessions
- Missing a location city
- Missing a location state
- Missing a location Zip or postal code
- Counseling Session Errors
- Missing an area of counseling.
- Zero counseling time (contact+prep).
- Too much counseling time (contact+prep). Nexus maximum is 9999.99
- A "Preparation" session cannot have contact time and must have prep time
Assuming Neoserra does not detect any errors in your export file, then the process of exporting your data to Nexus can be broken down into the following steps:
- Step 1: Create Nexus Export File
- Step 2: Download XML file to your computer
- Step 3: Login to Nexus
- Step 4: Upload XML file
- Step 5: ...WAIT...
- Step 6: Download and Import Validation Report
Step 1: Create Nexus Export File
You will need to create a copy of your Neoserra database to be exported to Nexus. This copy will include some, but not all of the data found in Neoserra. For example, your export file will never include pre-clients, or their activity. Nor will it include non-reportable activity. Furthermore, it is important to know that the export files never include Personal Identifiable Information (PII). Clients are identified by their internal Neoserra ID number, not by their name.
Follow these steps to create your Export file:- Enter Administrator-mode.
- From Neoserra, select Manage|Nexus.
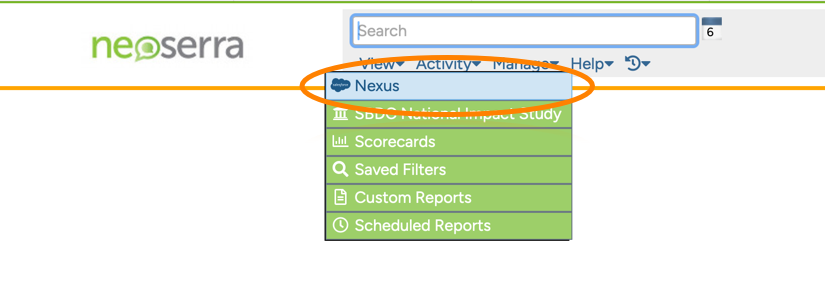
- Click the New link. If you do not see it, then you are most likely not logged in as an administrator:
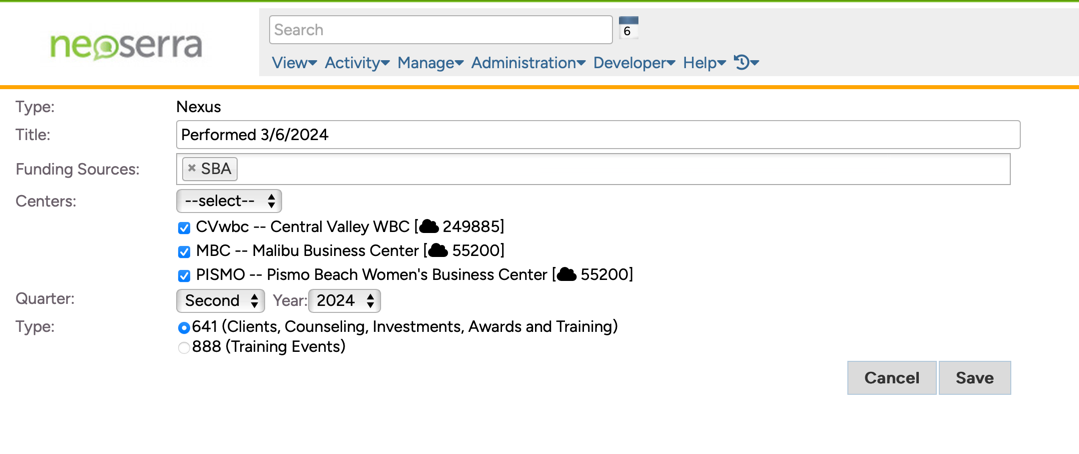
- In the Title field, enter a descriptive title that clearly states what data this test export encompasses. This title is only for your benefit and is not exported with the data.
- By default, the Funding Source(s) field displays the default funding source(s) pre-set on the Administration|Configuration|United States SBA panel. This is most likely "SBA." You can add additional funding sources if so desired, however, it would be best to update the United States SBA panel with these additional funding sources so as to ensure that the same funding sources are included in each export.
- By default, the Center(s) field displays the default center(s) selected on the Administration|Configuration|United States SBA panel. You can include/exclude SBDC, WBC or DUAL-funded centers as needed, but again, any changes made here probably also should be set as the new defaults on the United States SBA panel. Keep in mind that only centers with a Location Code can be included in your export. Similarly, only centers with complete address information may be included.
- Select the quarter and year for which you are creating the test export.
- For the Type of Export field, select either the "641 (Clients, Counseling, Investments, Awards and Training)" or "888 (Training Events)" option.
- When all export criteria is set, click the Save button.
Regardless of the quarter you select, Neoserra will always use the first day of the current fiscal year as the start date. This is to ensure that (1) any new records entered for prior quarters or (2) any records previously submitted that have since been updated are uploaded to Nexus. Nexus permits updates to previously-submitted records as long as those records were submitted within the current fiscal year.
Depending on the size of your database and the export file types selected the export process may take several minutes, so please be patient.
Step 2: Download XML file to your computer
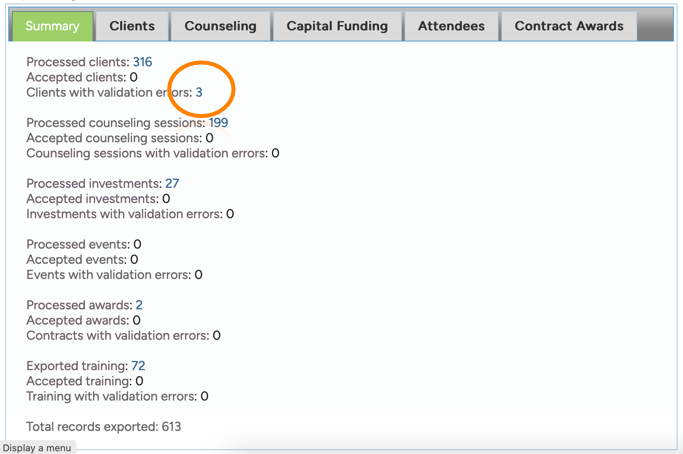
Upon completion of the export process, Neoserra will let you know if your data is fully compliant with Nexus, or whether it contains errors. If it contains errors, then you will see the following warning at the top of the screen and no XML file will be created:

At this point you will need to click on the records with validation errors:
And, correct the errors that Neoserra has identified:

Once you have corrected all the errors within this export file, then you must delete the export file, before you will be allowed to create a new one:
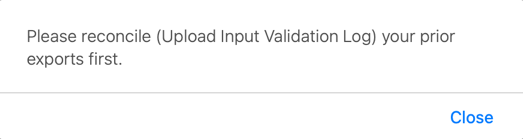
Neoserra requires you to reconcile each export file with a validation report provided by Nexus which tells Neoserra what records were accepted/rejected by Nexus. If an export file was never uploaded to Nexus because it contained errors, then no validation report can or will be issued by Nexus. Thus, an export with errors will need to be deleted before you can create a new export candidate that is truly exported to Nexus.
To create a new export file, simply go back to Step 1 and go through the steps again.
Assuming that your export file is now error-free then you will see the XML file in the Documents panel on the right-hand side:

This is the file to be exported to Nexus. The file will have a file name similar to the one shown above with Nexus-sequentialnumber-641.xml. When you download this file to your own system DO NOT CHANGE THE FILE NAME! Neoserra will only allow you to load validation reports that match this exact file name.
Right click on the file and download the file to your computer.
Step 3: Login to Nexus
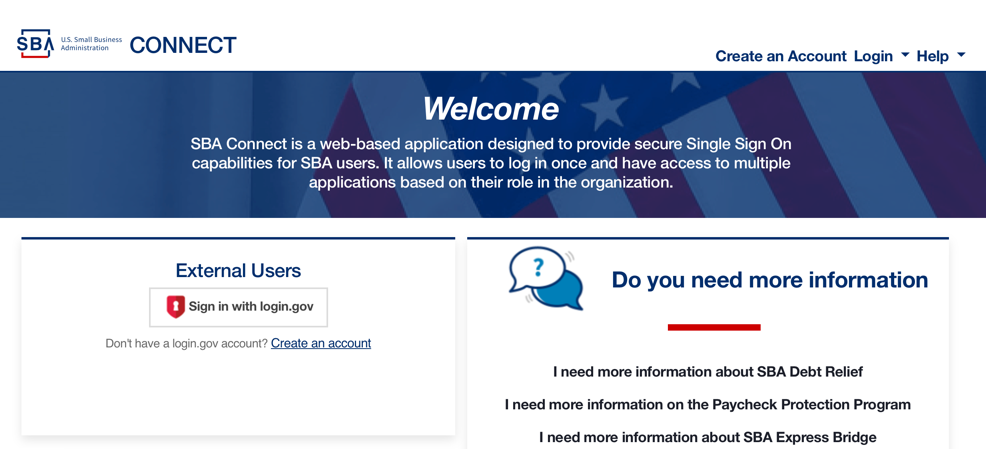
You will need to obtain your login credentials to the Nexus site (https://nexus.sba.gov/s/) from SBA. OutreachSystems cannot provide access to the Nexus site and all questions related to the site should be directed to Nexus@sba.gov
When you go to the site, click on the "Sign up with login.gov" button:

Step 4: Upload XML file
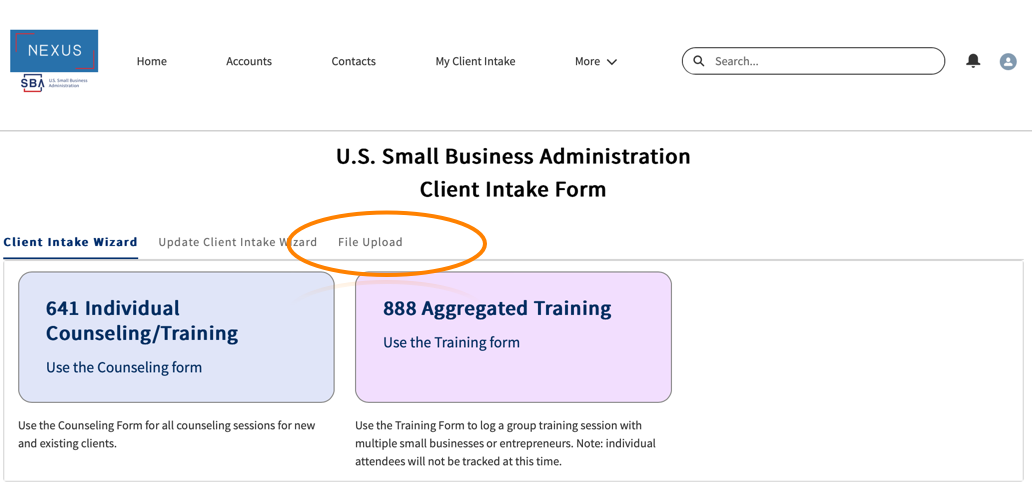
Once you are logged into the Nexus system, you will notice a big blue button on the home page to "Create New Client Intake":
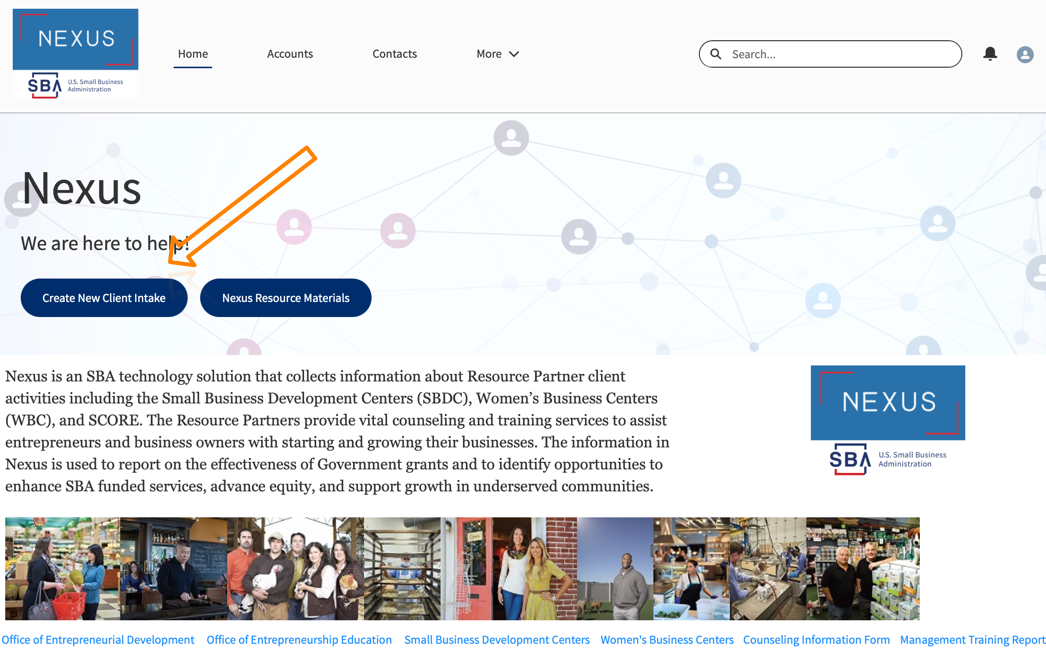
Click on this button to get to the next page where you can do an XML "File Upload." This is a good time to mention that you should never manually enter records into the Nexus system. Records entered into Nexus using the Nexus 641 or 888 interface can not be downloaded into Neoserra. All data entry should always be initiated in Neoserra.
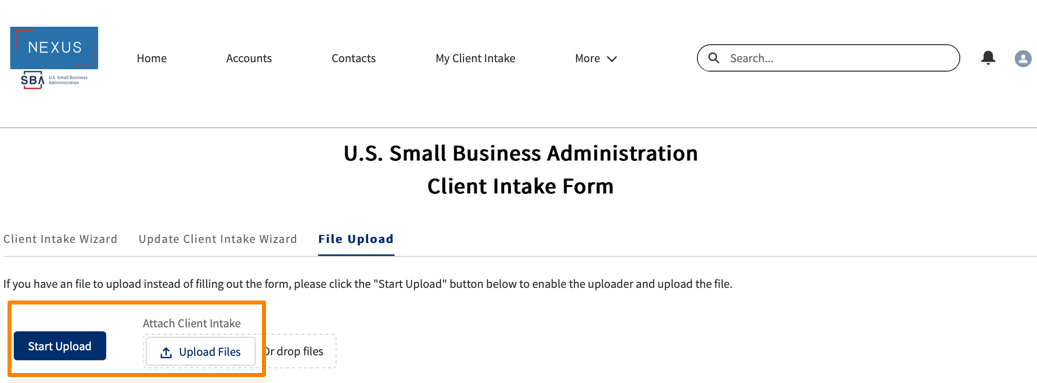
Next, click the "Upload Files" button and select the XML file that you downloaded in Step 2 from your computer.
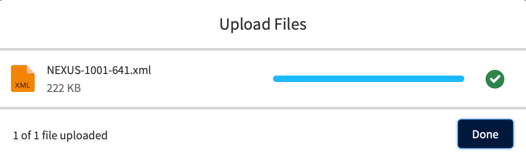
Once the file is uploaded, you can click "Done" and, assuming you uploaded both your 641 file and your 888 files, then, for the time being, you are indeed done.
Step 5: ... WAIT...
Based upon our testing, OutreachSystems has found that the Nexus processing time can take anywhere from 1 to 24 hours. You may or may not received an email confirmation when your file has finished processing.
Even if you did not received an email, you should still be able to safely log back into Nexus and retrieve your Validation Reports (see Step 6)
Step 6: Download and Import Validation Report
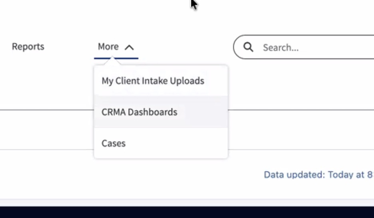
Log back into Nexus again, and now go to the More|My Client Intake Uploads page:
This will take you to a list of all your uploads:

Presumably the most recent two uploads will be the ones that you will want to click on. You will need to click on the 641 file, and then download the 641 Validation Report, and then go back and click on the 888 file, and download the 888 Validation Report. Do not download the 888 Validation Report from the 641 page nor download the 641 Validation Report from the 888 page! You need to be on the correct upload file to get the correct Validation Report:
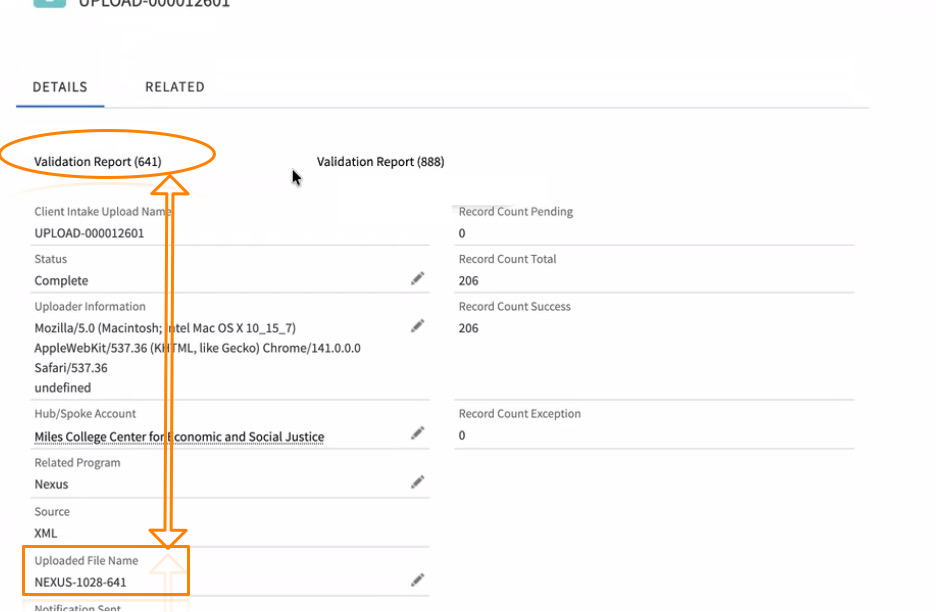
Also, on this page you will see the total number of records exported and the total number of successful records received. Ideally these two numbers should be the same and there should be no Record Count Exceptions. When you click on the Validation Report, you should come to a page showing all the records that you exported. If the page is BLANK then you downloaded the wrong Validation Report! The entire Validation Report, both successes, and possible exceptions, will need to be downloaded and imported into Neoserra.
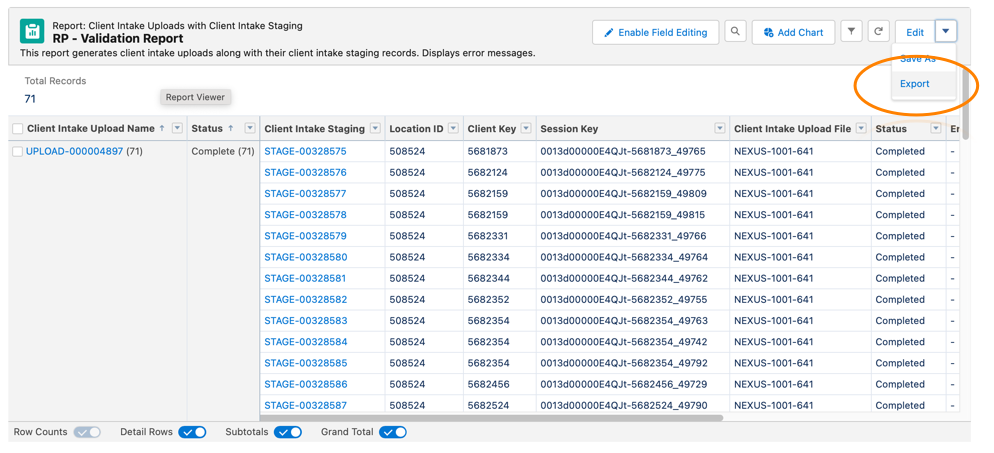
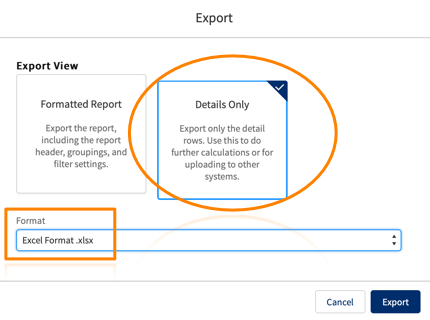
You can download the report by clicking on the Edit|Export option as shown above. Next, choose "Details" and the the .xlsx format:
At this point you can log out of Nexus, and go back to Neoserra to import this Validation Report into Neoserra. Log into Neoserra, go into administrator-mode and select Manage|Nexus.
It is absolutely critical that you match up the correct Validation Report with the correct Neoserra export file. In other words, Neoserra will not let you import the 888 Validation Report to your 641 export. Neoserra also will not let you import last quarter's 641 Validation Report to this quarter's 641 export.
The Neoserra XML file name is referenced inside the Validation Report. Neoserra will read the Validation Report to confirm that the filename referenced inside matches the Nexus-sequentialnumber-641.xml filename that Neoserra produced. The file name of the Validation Report itself is irrelevant.
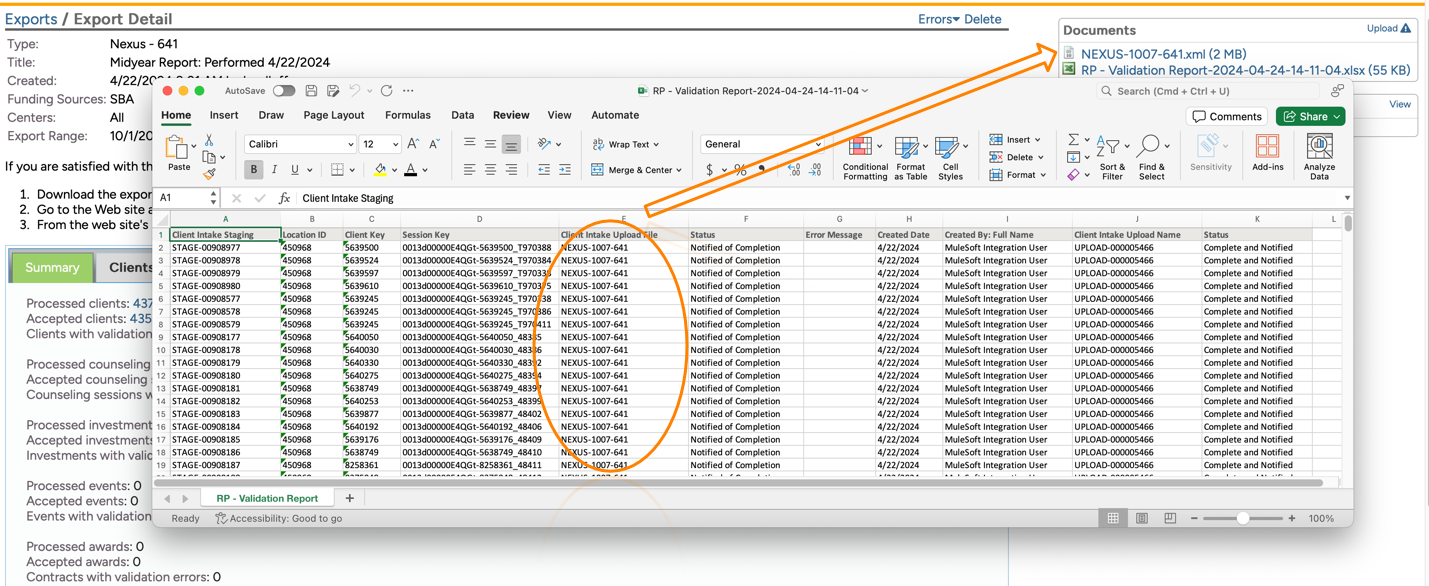
Click on the export file, and then select Errors|Upload Validation Report - keeping in mind that Neoserra will ONLY accept the XLSX detail format:
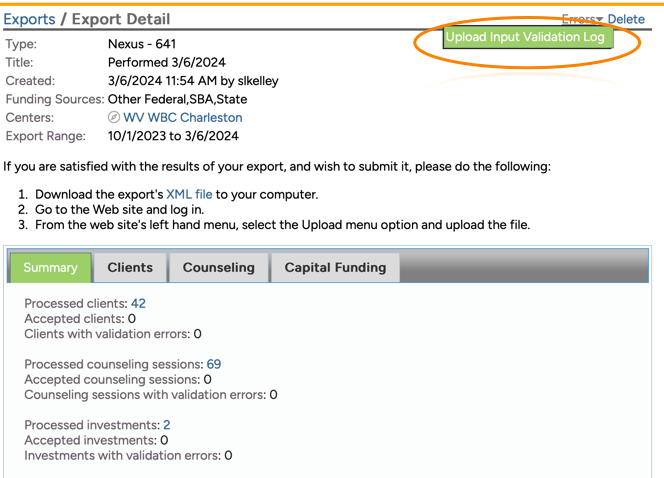
Neoserra will mark all records as accepted that it finds in the validation report (which should be all records). The uploaded Nexus Validation Report is now attached to the Nexus export record under the "Documents" heading.

We cannot emphasize enough how important it is to tell Neoserra which records were accepted by Nexus, and which records need to be corrected. This is an essential step in the entire process and should not be overlooked, so that Neoserra knows to track changes on those records that have alredy been exported to Nexus. Here is an example of the importance:
- Client X is exported to Nexus on January 15th, with 3 employees.
- On March 15th, the client record is updated and the client now has 5 employees.
- If no sessions are logged for this client, then Nexus will never know about the increase in jobs UNLESS Neoserra knows that Nexus needs to be updated with the change.
- The only way for Neoserra to know to track changes to Client X's record, is if the validation report is uploaded immediately after the January 15th export.
When Neoserra knows that a record has been accepted by Nexus, it's able to properly handle subsequent edits or deletions of that record according to Nexus requirements as discussed here.
Failure to import the Validation Report from Nexus, will result in a red warning icon next to your export:

This red icon is telling you that Neoserra does not know which records inside this export file were actually uploaded and accepted by Nexus, and which ones were not. Ideally, your Neoserra Nexus Export interface should be completely clear of red warning signs! If you create a test export and you don't actually intend to send the XML file to Nexus, then we recommend that you delete the export after you have reviewed the information. This will make it much easier to see your "real" exports, from your "test" exports.
Accepted records are never submitted to Nexus again, unless they are edited or deleted. Rejected records, of course, must be remedied.
Congratulations! You have completed your Nexus export process!
Note: Did you just complete a fourth-quarter export? If so, don't forget to lock data for the previous fiscal year, as described in Locking Data.
Want more? Browse our extensive list of Neoserra FAQs.