How do I set up eCenter Direct event payment to a Transact/CashNet merchant account?
If you post an event to eCenter Direct that has a fee associated with it, eCenter can be configured to handle online payment from event registrants. If your program uses a merchant account such Authorize.Net, PayPal, Stripe, Square or TouchNet (among others) then we recommend configuring Neoserra to receive online payments via one of these accounts. We do recognize that not all programs use one of these merchant services for their online payments and so we do allow you to integrate eCenter with other types of payment systems, although this does require additional programming work on your end.
In this FAQ, we'll discuss the following topics:
- Setting up an Cashnet account for use with eCenter Direct
- Enabling online payment for an event
Setting Up an Cashnet Account for Use with eCenter Direct
The steps for setting up one or more Cashnet accounts for use with eCenter Direct are outlined next:
- If you haven't already, sign up for a Cashnet account. Note, that eCenter Direct is configured for Checkout transactions, not Gateway transactions.
- Once a Cashnet account is in place, you are ready to configure your Neoserra system. First, you must enter administrator-mode and click on Administration|Configuration. To avoid errors or even fraud, it is important for Neoserra administrators to carefully manage the training payee information entered into Neoserra.
- Open the "eCenter Settings" area and, from under the "Training Payees" heading, click the Add button:
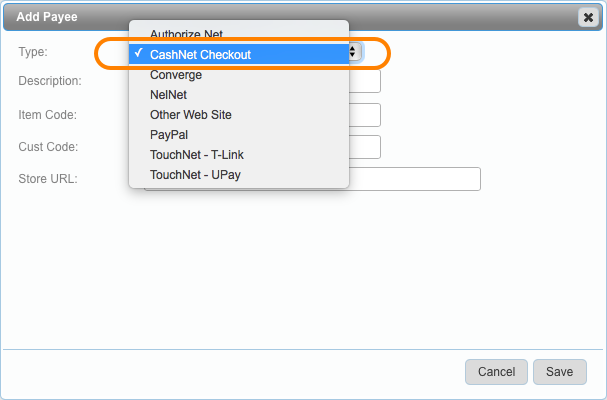
- At the "Add Payee" screen, select "Cashnet Checkout" from the Type field.
- Enter a description for the Cashnet account. This is especially important if you will be configuring multiple Cashnet accounts for multiple regions. The users will use this description to determine which Cashnet account to associate with their respective training events.
- Next, login to your Cashnet account for Administrator Access and go to the "Store Setup" menu option within Cashnet. Here you will find your "Item Code," "Cust Code," and your "Store URL." These tokens need to be entered into the Neoserra configuration interface, as shown below:
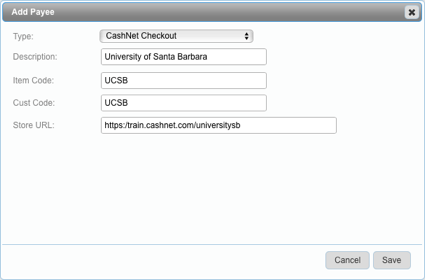
Note that the screenshot above is only a sample, you will need to obtain your own values for these fields.
- Also, on the Store Setup page, you will want to configure the following questions:
Question Answer Do you want to pass information back to the calling system by appending data to the signout URL? Append data and redirect using the HTTP 'post' method Do you want to receive notification of successful and/or failed transactions via email, https get or post messages? Yes HTTP notifications for failed transactions https://xxxxxxx.ecenterdirect.com/payment/cashnet/notify HTTP notifications for successful transactions https://xxxxxxx.ecenterdirect.com/payment/cashnet/notify Select format for HTTP content Name Value Format (POST) Note: The xxxxxxx reference above, should be filled in with your eCenter Direct unique path.
- Click Save.
- Repeat steps 3-7 to add as many Cashnet accounts as necessary.
You will need to ask your merchant to add the following IP addresses to their firewall as an outbound rule:
- Address: 75.2.122.198
- Address: 99.83.145.129
- Address: 13.248.234.214
- Address: 76.223.106.180
As discussed in the Enabling Online Payment for an Event section of this FAQ, every Cashnet payee account entered into Neoserra is available for selection from the training event record.
Enabling Online Payment for an Event
When you create an event in Neoserra and want to accept online payment for that event, you will need to indicate a payee. To do this, select the appropriate payment account from the Online Payment field found on the eCenter tab of a conference record, as shown in the next graphic:
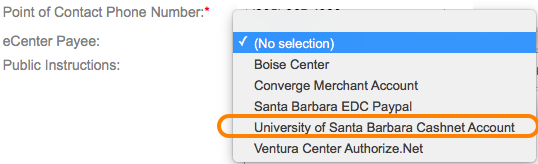
Note: In addition to adding the payment system account, a training event record must have the following attributes in order for attendees to pay online: (1) it must have a status of "Open" and (2) its fee must be exposed on eCenter. If the event is full and you allow a waitlist, waitlisted users will not be presented with the online payment option.
Once the event has been configured properly, it will be published on eCenter Direct. Clients can click the "Sign up" button on eCenter Direct to sign-up for the event:

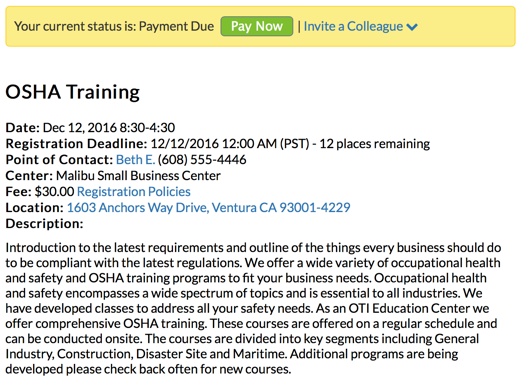
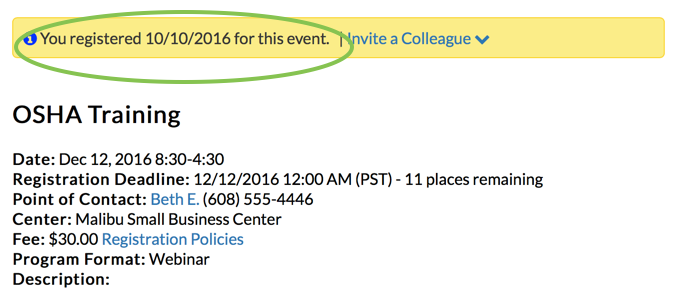
If the event has a fee associated with it, then the client will be initially registered with a status of "Payment Due" as indicated at the top of their registration page:
Similarly, in Neoserra, their status will also show as "Payment Due":
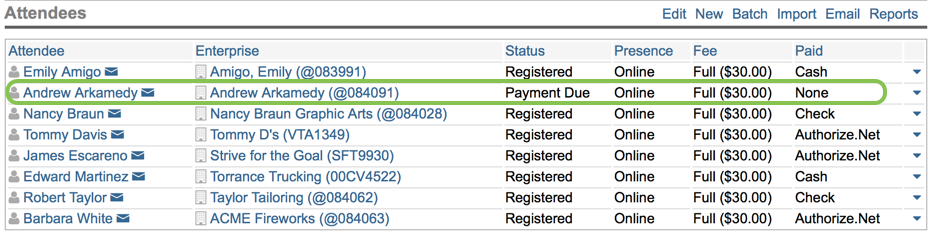
People who have registered, regardless of whether they have paid or not, will count towards the maximum number of attendees for the event. However, the person's registration won't be complete until payment has been made. The registrant will initially receive the 'Signup Notification (Payment Required)' email message. Once they submit their payment, they will receive a second registration confirmation email using the 'Signup Confirmation (Existing User)' template:
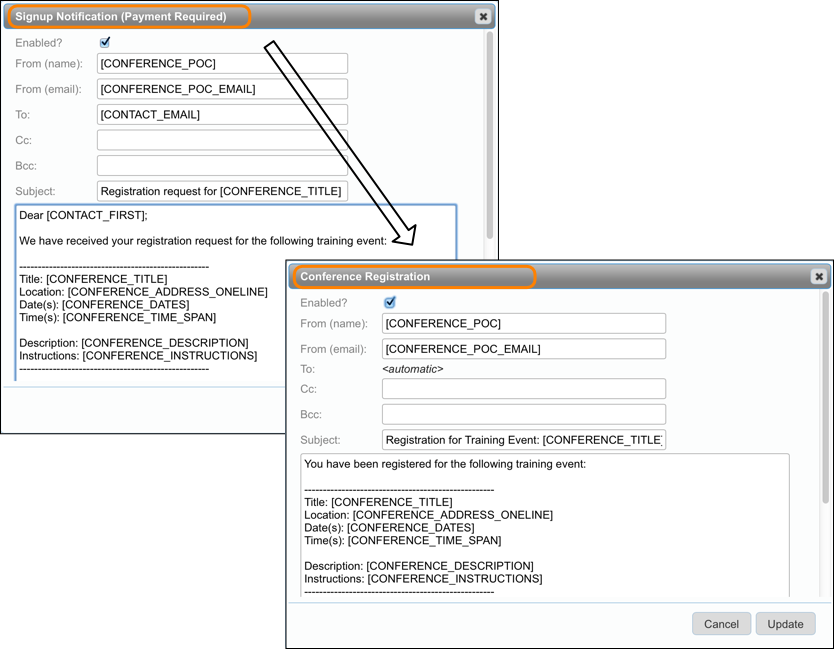
While these templates can be customized, it is recommended that these templates are not disabled. Once the registrant pays, either online, by sending a check or providing cash their "Paid" status in the attendee list should be updated to reflect the amount they paid and the method of payment. As soon as this information is updated, it will not only trigger the email message referenced above, the registrant's status on eCenter Direct will also automatically change to "Registered:"
Want more? Browse our extensive list of Neoserra FAQs.