How to use the Export Module in Neoserra?
Neoserra allows administrators, in administrator-mode, to export large amounts of data for use in third-party applications such as Microsoft's Power BI or Tableau.
An export is always associated with a filter, and the data will be presented in a CSV format. By default, the internal code values will be included in the file unless a cross walk is created.
It should be noted, that OutreachSystems does not provide customer support once the export file has been created. In other words, our customer service team cannot assist you with the import of the data into third-party application. Our support is limited to the creation of the exported file. In this FAQ we will discuss the export process.
- How to create an API user account
- How to create an export definition
- How to create a data dictionary layout report
- How to create a code cross-walk
- How to manually run your export
- How to create an export application
How to create an API user account
Rather setting up the export process under an existing user account that is associated with a human being that may ultimately leave your program, OutreachSystems recommends that you create a separate administrator account under which the process will be configured. You can give the user account a distinctive name such as "Integration User" so that you can easily recognize it as a non-human account. The reason for this recommendation is that employees may come and go from your program, and setting up a process under one person's account means that that account has to remain active, even after the employee is no longer associated with your program in order to access the data, thus creating a security risk to your data:
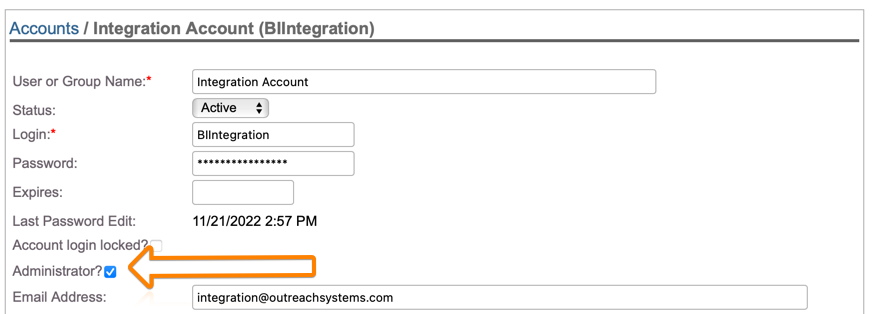
Once the integration user account has been created, we recommend that you login using this new account and configure the export process under this account. Setting up the export process under a generic user account will ensure that the processing can continue even if the staff member who configures it, is no longer active with your program. However, since this is basically still a normal user account, Neoserra's automated inactivation process will still kick in 180 days after the last login. In other words, you still run the risk of having this account inactivated after 180 days of no login.
As such, once you have created your export processes and everything has been configured, we now recommend that you go to edit this same user account again, and change the Status from "Active" to "Service:"
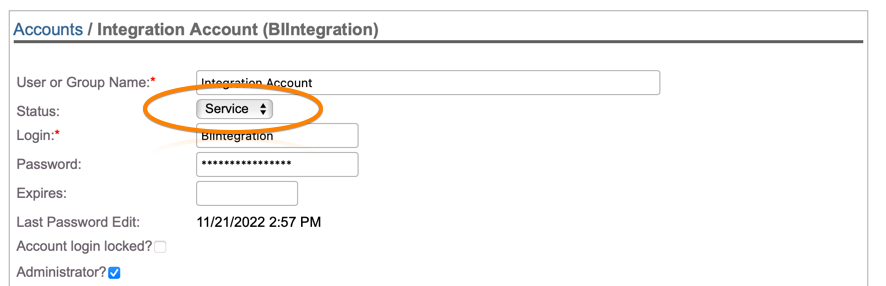
If you don't see the "Service" option on the list then you can go to Administration|Configuration|Pick Lists and edit the Account Status pick list. Here you should be able to activate the "Service" option.
Service accounts are special accounts that don't inactivate after 180 days, but Service accounts also cannot be used to log in to Neoserra. As such, changing the account to a Service account should only occur once the entire process has been configured and tested.
How to create an export definition
Under the Administration menu, you will find the "Export Module" menu selection. Initially the interface will simply present you with the option to create a new definition or a cross-walk:

Click "New" to create your export:
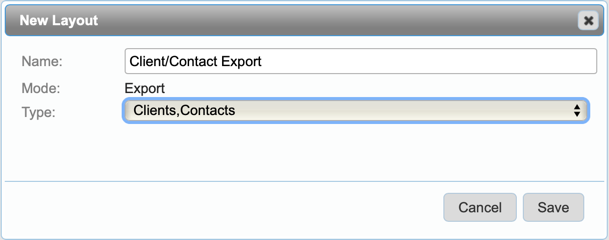
Provide a name for your export and choose the type of data you want to export. Click "Save". You will now be presented with the interface where you can start to add fields:

You can choose as many fields as you want for export. Once you have selected all your fields click "Save" to see the fields selected. If you need to add more fields, then you can click "Add Fields" again to add the remaining fields:

You can use the "Reorder" option to move fields into the order in which you want them included in the CSV file. The first row of the CSV file will always contain the name of the field. The second row and beyond contain the record data. Dates are returned in the user?s timezone at the time they created the export. Dates are returned in the standard Neoserra date format of MM/DD/YYYY HH:mm. Fields with null values are represented as an empty value in CSV. Codes will be exported based upon the internal Neoserra code value. If you want to expand the codes to the Neoserra value then you can "Edit" the coded field, and choose to transform the code to the description:

How to create a data dictionary layout report
Once you have created your export definition then you can share the layout with your third-party system in a report format. The Neoserra Layout Report includes the field type, the field length and the code and description values that are valid within your Neoserra database. Keep in mind that all Neoserra databases are unique, and different values and different fields may be found in other databases.
You can find the Layout Report under the "More" menu at the top of your Export definition:

The report will include all the fields that you included in your export file plus all the codes enabled in your database:

It is important to note, that if you create a crosswalk, as discussed below, then the crosswalk values are not included on the report. Neoserra will reference that there is a crosswalk but it will be up to you to provide the crosswalk code values to your partner.
How to create a code cross-walk
If you don't want the internal Neoserra codes in your exported file, nor the Neoserra description, then alternatively, you can create a code cross-walk. Click to return to the main Export Module interface and choose More|Cross-walks:

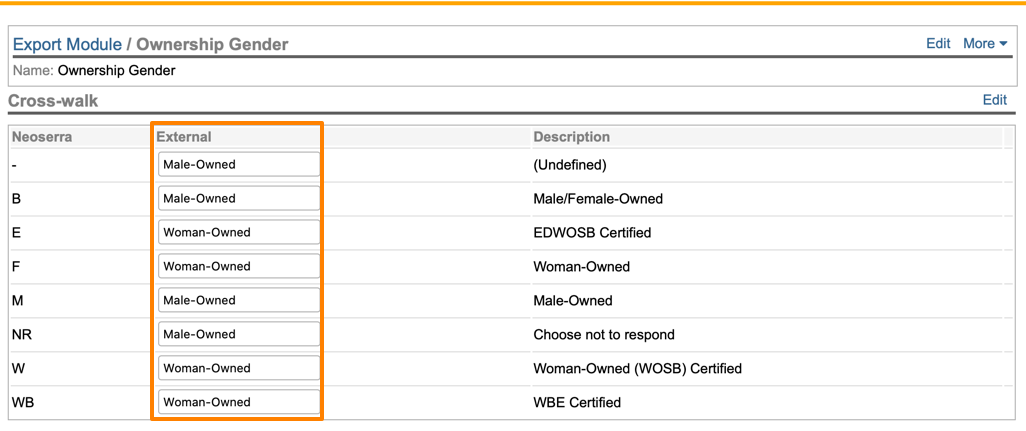
Click "New" to create a new cross-walk. Enter a name for your cross-walk and choose the pick list from the drop down. Click Save to save you entry and you can now create your cross-walk:
To apply your new cross-walk to the export simply go back to your export and "Edit" the field for which you created a cross-walk:
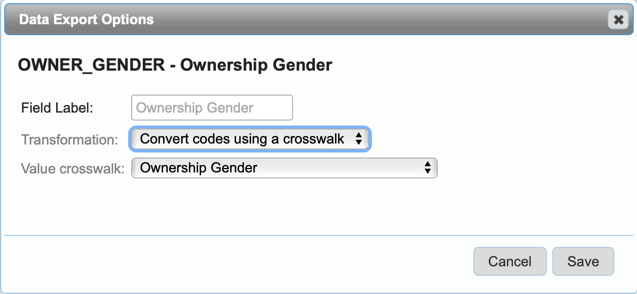
Click "Save" and the codes will be expanded during the export to the new values entered in your cross-walk. The screen will display the order in which the fields will be exported and any transformation that will take place during the export:
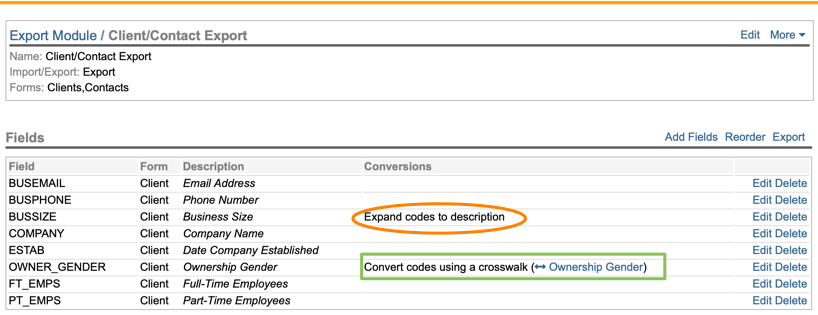
In orange we see that the Business Size field will be exported using the Neoserra description, while the Ownership Gender field will be exported using the custom cross-walk.
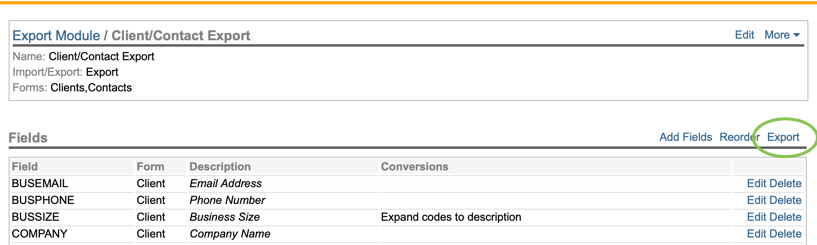
How to manually run your export
As noted in the introduction, you must first create a filter before you can run your export. A filter must be created and saved. To run the export simply click the "Export" link at the top of the page:
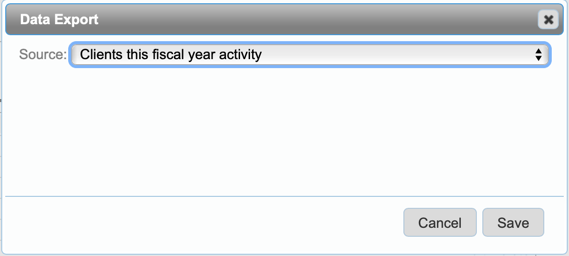
You will be asked to select a saved filter that corresponds to the form type that you are exporting, and only records matching this filter will be exported:

How to create an export application
Rather than running the export manually, the administrator can also set up a user application under their Personal Preferences. Again, keep in mind that OutreachSystems recommends that you use a generic service account for this function - not an actual user account. Setting up the automated process under a service account will allow the process to continue even after the person setting up the integration is no longer associated with the program.
Scroll to the bottom of the screen and select New|Export. Enter a name for your export, choose your export definition as created in the Export Module, and choose the corresponding filter in the Source field:
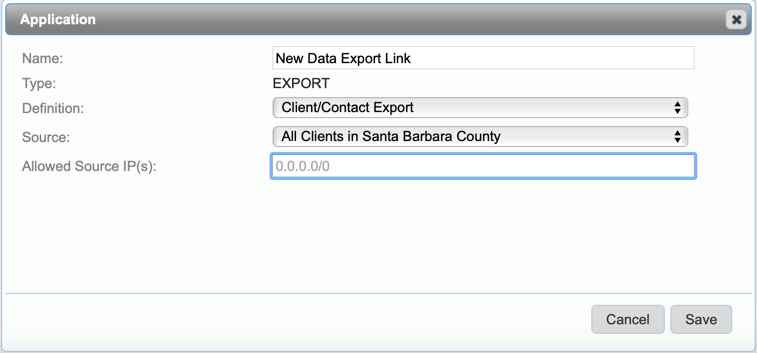
Leaving the "Allowed Sourced IP(s)" field blank means that your data can be accessed from anywhere on the internet. Alternatively, you can list specific IPs in CIDR notation separated by commas to limit access to only those IP addresses listed.
The data served up by the URL is "live". In other words, the data constantly serving up the most current data in the database.
Once you have fully tested your solution and you are happy with the output, remember to change the integration account that you created initially to Status: Service.
Want more? Browse our extensive list of Neoserra FAQs.